In this section, we provide guides and references to use the Sagemaker connector.
Step 1 –: Create New Service
- Create New Service to click on + ADD .
- The first step is to ingest the metadata from your sources. To do that, you first need to create a Service connection first.
- This Service will be the bridge between Prakash and your source system.
The Add New service form should look something like this
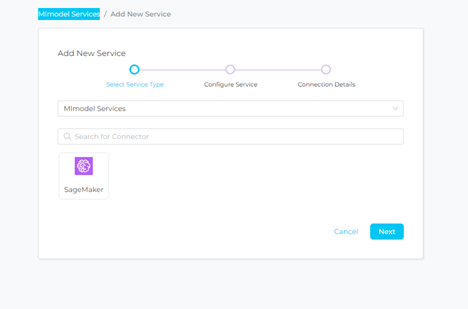
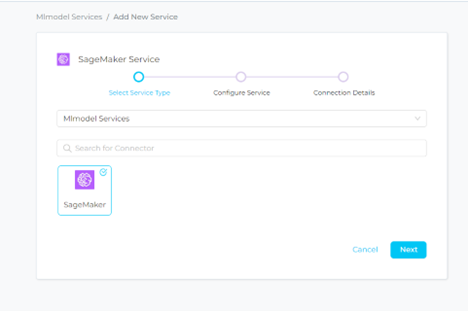
Step 2 –: Select SageMaker Service Type
Select SageMaker as the Service type and click NEXT.
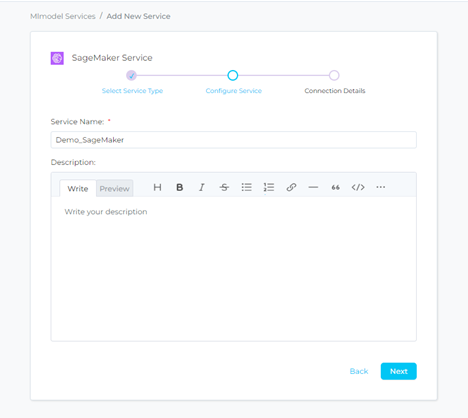
Step 3 –: Name and Describe Your Service
Provide a name and description for your Service.
Service Name:-
- Prakash uniquely identifies Services by their Service Name. Provide a name that distinguishes your deployment from other Services, including the other SageMaker Services that you might be ingesting metadata from.
Note that when the name is set, it cannot be change.
Step 4 –: Configure The Service Connection
- in this step, we will configure the connection settings required for SageMaker.
- Please follow the instructions below to properly configure the Service to read from your sources. You will also find helper documentation on the right-hand side panel in the UI.
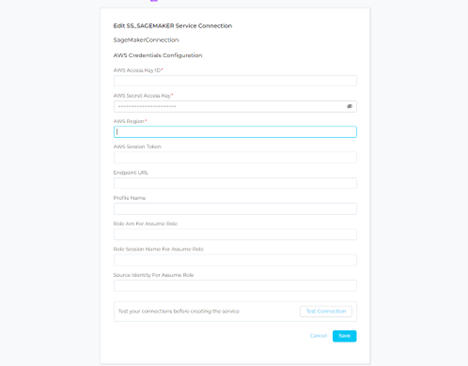
Connection Details: -
- AWS Access Key ID: Enter your secure access key ID for your SageMaker connection. The specified key ID should be authorized to read all databases you want to include in the metadata ingestion workflow.
- AWS Secret Access Key: Enter the Secret Access Key (the passcode key pair to the key ID from above).
- AWS Region: Enter the location of the amazon cluster that your data and account are associated with.
- AWS Session Token (optional): The AWS session token is an optional parameter. If you want, enter the details of your temporary session token.
- Endpoint URL (optional): Your Glue connector will automatically determine the AWS SageMaker endpoint URL based on the region. You may override this behaviour by entering a value to the endpoint URL.
Step 5 –: Check Test Connection
Once the credentials have been added, click on TEST CONNECTION To Check Credentials is valid or not.
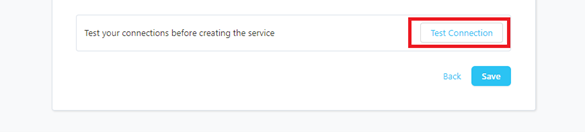
If Test Connection Successful after that click on SAVE and then configure Metadata Ingestion.
Step 6 –: Configure Metadata Ingestion
In this step we will configure the metadata ingestion pipeline, Please follow the instructions below.
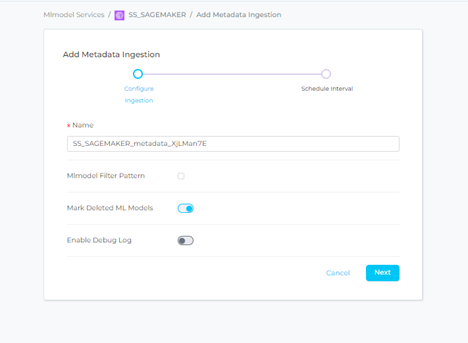
- ML Model Filter Pattern:- Note that all of them support regex as include or exclude.
- Mark Deleted ML Models: Set the ‘Mark Deleted Dashboards’ toggle to flag Pipeline as soft-deleted if they are not present anymore in the source system.
- Enable Debug log:-
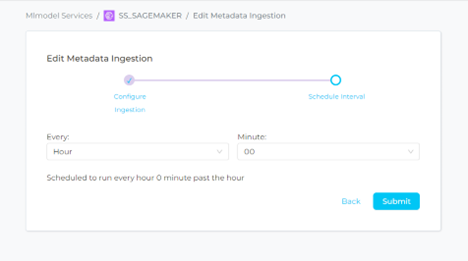
Step 7 –: Schedule the Ingestion and Deploy
- Scheduling can be set up at an hourly, daily, weekly, or manual cadence. The time zone is in UTC. Select a Start Date to schedule for ingestion. It is optional to add an End Date
- Review your configuration settings. If they match what you intended, click DEPLOY to create the service and schedule metadata ingestion.
- If something doesn’t look right, click the BACK button to return to the appropriate step and change the settings as needed.
- After configuring the workflow, you can click on DEPLOY to create the pipeline.
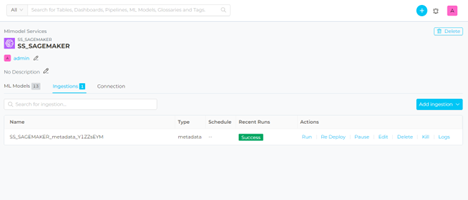
Step 8 –: View the Ingestion Pipeline
Once the workflow has been successfully deployed, you can view the Ingestion Pipeline running from the Service Page